Using Docker and PhantomJS to generate big Twitter headings
When you have a blog like this one, or are trying to promote some kind of content like a book on API development with Go, you might be thinking of how to expose your content to a wider audience. Sure, writing about what people actually need is always good, but how can you make sure that you stand out?
I’m following Codeship on Twitter, and their posts are wonderfully equipped with an eye-catching splash image, along with the author avatar, twitter handle and an actual title of the article. Wow.
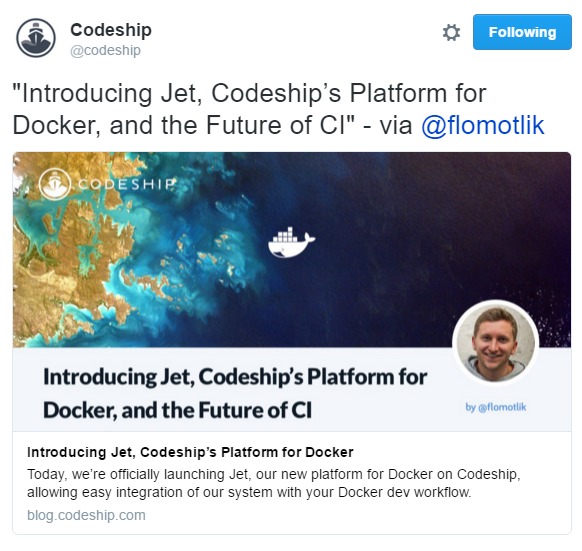
There’s no way in hell I’m opening Photoshop to create such an image.
But, I’m pretty good with code. Maybe I can create a page, which would look exactly like that one? I know I can, but just to create it by hand, to cut out a screenshot? Not what I have in mind for every blog post. I would love to make it repeatable and automated.
I started building a list of things I need to solve my issue:
- Put together a web page template which replicates this design,
- Get some royalty-free graphics assets (free as in completely free),
- Take a screenshot of the page and save it in my blog
- Actually make sure that my blog is set up correctly
Putting together a web page
This part, while a bit time consuming, was very much fun to do. Mainly it was fun because of certain requirements which I had. I wanted to configure the content for everything - background, logo, avatar,… and I didn’t want to use server-side technologies to do it. I wanted everything to be done with JavaScript, and I didn’t want to host it myself.
Nothing with this was terribly new for me - some javascript to read parameters passed to the HTML file, some jQuery to vertically align the title which might break into two lines. Collecting some graphics assets - the Docker stickers, the kitten avatar by @hoppip (he’s awesome, check out his shop on society6).
I put everything on GitHub and we will use this in our examples below. If you want to start generating cards for yourself, you’re free to use this foundation, and if you want, you can always copy the files and create your own modifications. It’s like I’m explaining how open source works… ah.
Get some royalty-free graphics assets
Getting nice splash images used to be such a chore before Unsplash. In the last years the guys behind the service implemented a very nice developer API, which allows to query their photo database and embed results directly to your page.
You can for example:
That quite quickly satisfied my needs.
Taking screenshots
I’ve had issues where I evaluated at least three Docker Hub images - before just building my own. For example, the ubermuda/docker-screenshot
image doesn’t support HTTPS, had rendering issues. I was looking at manet because they had a working demo on Heroku,
but the docker image didn’t work. I had to upgrade all dependencies and fix the build process before I got it to work. But it didn’t have
a CLI interface - starting up a container only to query it with curl a few seconds later - this is what people call “too many moving parts”.
Eventually, I asked a friend who used something for a screenshot. That something was webshot-cli. Of course, the docker image was outdated (built a year ago, had same rendering issues) - the sad part about the whole thing is, that it could just have been rebuilt and it would pull the new dependencies. If only I could.
So, since I was stuck making a few Dockerfiles, I created them for manet and for webshot-cli.
I pushed the images to docker hub, so now you can pull them from titpetric/manet or titpetric/webshot-cli.
Note: resulting images are quite big, mostly due to the node source image - this might mean about 1GB of a pull if you don’t have those locally.
So finally, I could screenshot my page. I set up a bit of code to configure all the parameters:
#!/bin/bash
urlencode() {
local length="${#1}"
for (( i = 0; i < length; i++ )); do
local c="${1:i:1}"
case $c in
[a-zA-Z0-9.~_-]) printf "$c" ;;
*) printf "$c" | xxd -p -c1 | while read x;do printf "%%%s" "$x";done
esac
done
}
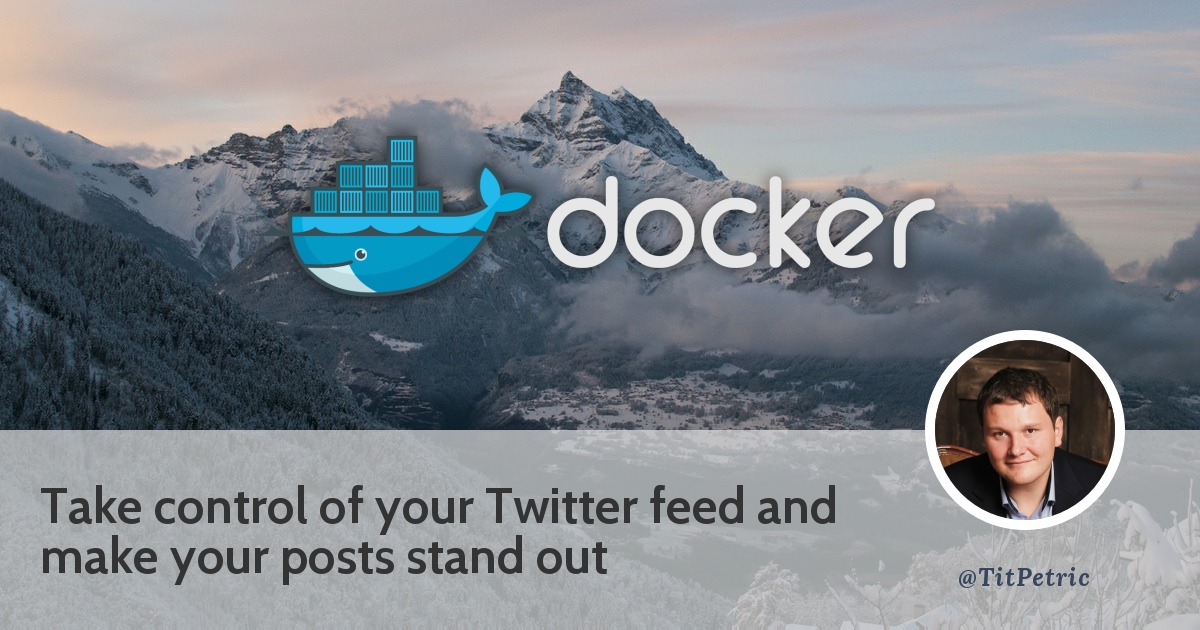
TITLE=$(urlencode "Take control of your Twitter feed and make your posts stand out")
AVATAR=$(urlencode "https://scene-si.org/css/images/avatar.jpg")
TWITTER=$(urlencode "@TitPetric")
STICKER=$(urlencode "stickers/docker.png")
BACKGROUND=$(urlencode "#ccc url(https://source.unsplash.com/featured/1200x630/?mountains) top left no-repeat")
URL="http://titpetric.github.io/2016/twitter-card/?title=$TITLE&avatar=$AVATAR&twitter=$TWITTER&sticker=$STICKER&background=$BACKGROUND"
docker run --rm -v `pwd`:/app -w /app titpetric/webshot-cli --window-size=1200/630 --render-delay=100 $URL twitter-card.png
That’s really all there is to it. I could even have made a web interface to generate these, but I wanted to leave myself the option to fully automate it - after all, I’m writing my blog in Markdown files, from a terminal - I can also read them with a similar script, and completely automate generating Twitter cards like this one:
{% asset_img another.jpg "" %}
Setting up my blog
The format of these Twitter cards is set from the web page which is published to Twitter. So when I post a link to the blog, the page should include some specific header, that tells Twitter how to display the preview.
<meta name="twitter:card" content="summary_large_image">
<meta name="twitter:site" content="@codeship">
<meta name="twitter:image" content="[URL]">
You’ll have to make sure that your page includes these tags.
A bonus
The limitations for Twitter Summary Card images is that they need to be smaller than 1MB. There is almost no wiggle room at the size that Codeship has chosen for this - images at 1200x630 clock in usually just under 1MB. Just in case, you can use this nifty oneliner for reducing the size of images using OptiPng.
docker run --rm -v `pwd`:/app -w /app buffcode/docker-optipng -o7 github.png
This usually gives about 25% of size savings. After that, you might have to resort to resizing if your image is still more than 1MB.
Closing words
This was a fun exercise which hopefully shows that you don’t need to be a designer to create something nice. You just need to be a little bit resourceful with what you have. And perhaps, the designer at Codeship can employ the method above, freeing his or her time.
While I have you here...
It would be great if you buy one of my books:
- Go with Databases
- Advent of Go Microservices
- API Foundations in Go
- 12 Factor Apps with Docker and Go
For business inqueries, send me an email. I'm available for consultany/freelance work. See my page for more detail..
Want to stay up to date with new posts?
Stay up to date with new posts about Docker, Go, JavaScript and my thoughts on Technology. I post about twice per month, and notify you when I post. You can also follow me on my Twitter if you prefer.